Categories and types
Multiple-category selection, support for rooms and multi-category tags, and a tag type for each category.

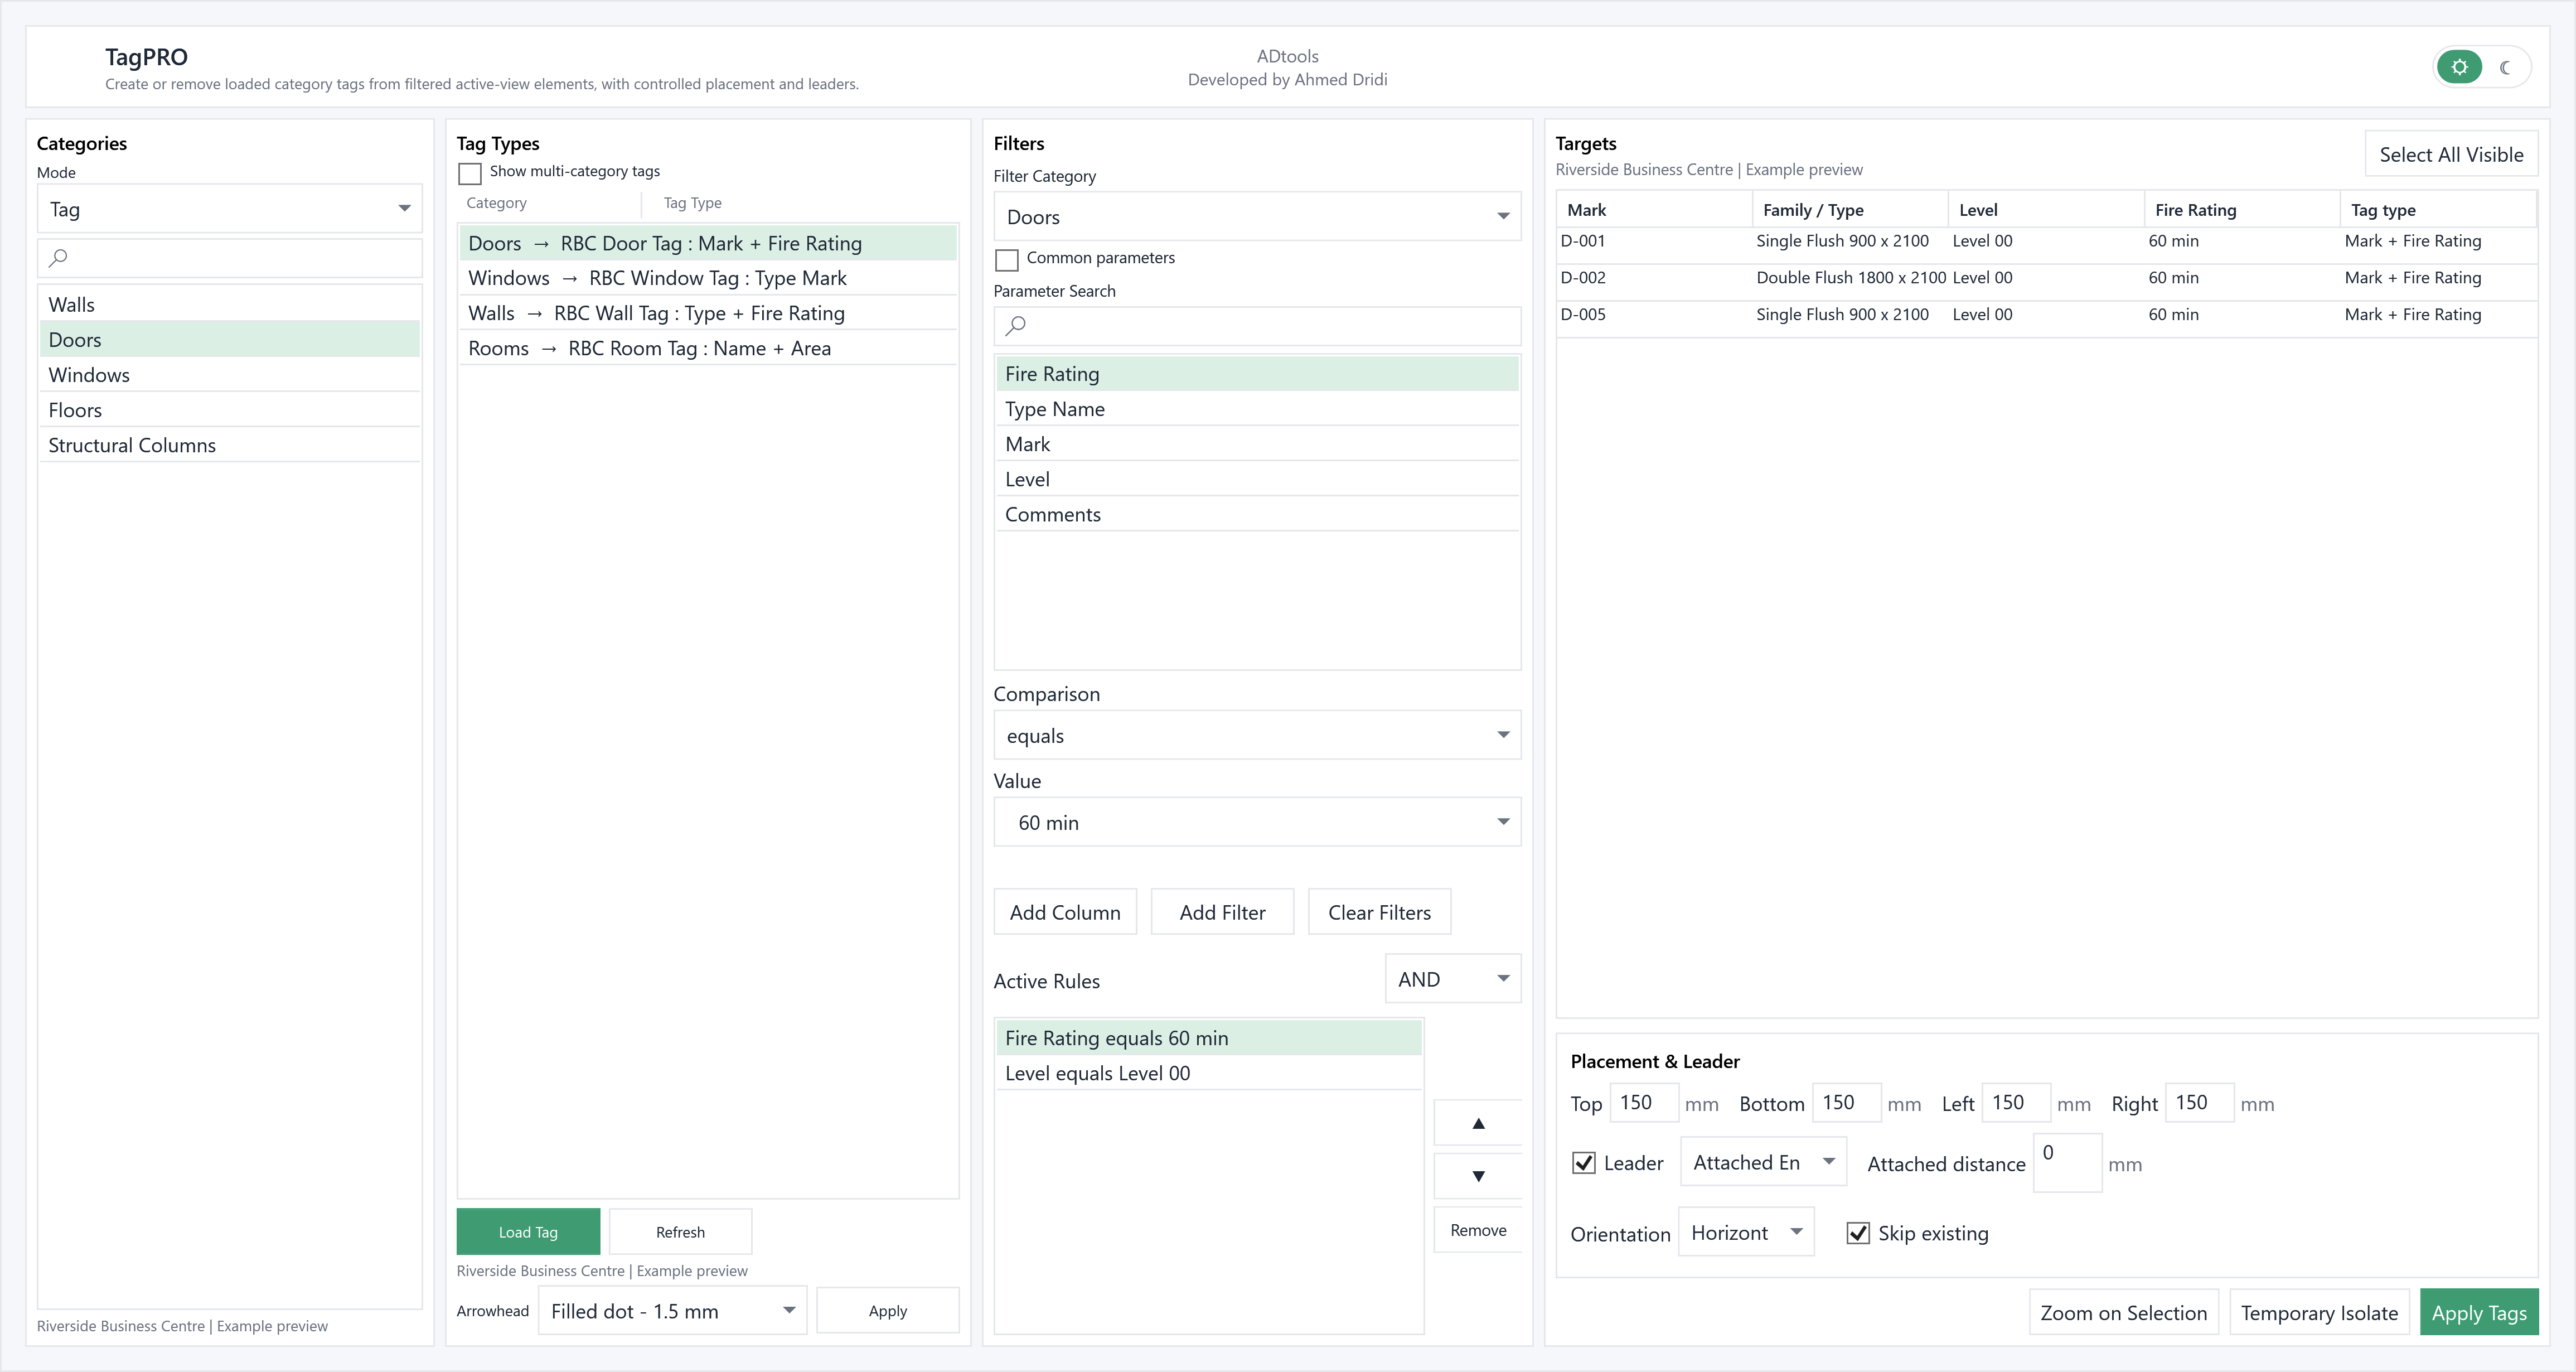
TagPRO brings together tag placement and removal in the active view. Define exactly which elements to tag, which tag types to use and where tags should be placed.
Multiple-category selection, support for rooms and multi-category tags, and a tag type for each category.
Parameter and value rules using AND / OR logic to target only the required elements.
Orientation, leader, attached or free end, and top, bottom, left and right offsets in project units.
Skip elements already tagged, manage arrowheads and use Untag to remove selected tags.
Choose a category and a tag type loaded in the project. Search, parameters, comparisons and AND / OR rules narrow down the relevant visible elements.
Define top, bottom, left or right offsets, horizontal or vertical orientation, and whether to use a leader. Choose an attached or free end and set its distance.
Check targets in the table, zoom or temporarily isolate them, then apply tags. Skip existing avoids retagging elements; Untag removes the targeted tags.
In a floor plan, filter the doors to tag, choose their tag family and a shared offset. Check the retained doors before placing tags.
In the modelDoors D-001 to D-003 and loaded RBC Door Tag families.
In the extensionMap Doors to Mark + Fire Rating, Windows to Type Mark, and Rooms to Name + Area.
Check the resultReview the assigned tag type in the table before placement.
Illustrative example: the windows are populated with a fictional English-language Revit project, “Riverside Business Centre”.